Showing posts with label DIY. Show all posts

Monday, September 24, 2012

Wedding DIY: Getaway Ribbon Wands

My original dream of a wedding getaway was running through a aisle of friends holding sparklers, but that vision was crushed when the Woodruff-Fontaine House notified me that it has a huge fire hazard. 
Well, the house is nearly 150 years old, after all. 
So I had to come up with something to please both the venue and myself. 
And trust me, I adamantly refuse to be pelted by bird seed...ouch.


What You Need:
- 12 inch dowels 
- 18 mm jingle bells
- jewelry wire
- hot glue
- various colored ribbon

1. I used the jewelry wire to string and tightly wrap each jingle bell on the ends of the dowels and secured it with a drop of hot glue. The glue is just to make sure the wire doesn't slide around. 

2. For the wands, I chose coral, grey, and champagne gold ribbon and cut them into roughly 15 inch strips. *Helpful Hint: By unrolling my ribbon, folding it in half over and over, and then snipping the looped ends, I was able to make sure none of my ribbon was wasted. 

3. Because the grey was twice as thick as the gold and coral ribbon, I used 1 part grey to two parts gold and coral on each wand. I read many a tutorial that suggested hot gluing the ribbon to the dowel, but I looped a knot at the end and it was secure, so to each his own.


Although I ran out of ribbon before I could finish all of my wands, I went back to the craft store and bought a roll of lace to add into the fold. I adore the vintage look. :)


Now I'm curious! How did you make your wedding getaway?


xoxo,

Wednesday, May 9, 2012

crafty kraft paper

There is just something I love about wrapping with kraft paper.
I think it stems from the simplicity of the paper.
 It allows you to add any embellishment that you want.

Lately I've been wrapping it with neon flagger tape, and Japanese washi tape.

The best part of flagger tape is that is not actually "tape" and more like a strip of plastic I can tie for bows.
Japanese washi tape is a decorative masking tape that's easily removable. 

These two are my current favorite layering duo. :)

Here's a few more kraft paper ideas I love:


via both here & here

xoxo,

Friday, April 27, 2012

EmiJay hair ties & my "aha" moment


I first fell in love with Twistband hair ties (not shown) when one was given in my March Birchbox.
Y'all this thing has not left my wrist since.

Then I came across the Multitude hair ties by EmiJay at Anthropologie (which is pretty much the same thing). 
When I first saw these things a few years back, I didn't get the hype, but I certainly do now.

And by the time I finally convinced myself that I needed them, they only had headbands left. 

Hairbands...I don't wear them (unless you count the ratty one I use while washing my face).

So what's a girl to do?
Buy the headbands and cut them into hair ties, of course!
snip snip...


Boom. Eight new hair ties.


The glittery ones are my new favorites. :)


Happy Friday, y'all!!
xoxo,
 

Monday, April 9, 2012

Easter OOTD & Two Tone Nails

Hey everyone! 
Let me tell you, I've enjoyed all of your Easter recaps...good food, cute outfits, and praising some Jesus!
Love :)

My Easter plans, unfortunately, didn't quite go as planned.
You see, my youngest niece, Autumn Marie, woke up with a wicked fever, and taking one for the team, I stayed at home and nursed that little one back to health while my sister, BIL, and Ava Grace ventured out for Easter festivities. I can't lie, having a two-year-old who just wants to cuddle all day didn't ruin my plans at all. Not to mention, we stayed in our pajamas, gorged on Easter candy, and I went without a stitch of makeup the entire day. That's what I would call a silver lining.

And since I didn't wear my Easter best, I'll just save it to wear sometime this week.


 Essie, Alex and Ani, Anthropologie


ShopStyle

Easter Outfit: Anthropologie dress, Alex and Ani bangles, 
and Essie's Turquoise & Caicos & School of Hard Rocks

During little one's nap, I went ahead and did my nails.

Sweet and simple.
I'd like to think of it as "color blocking" for your nails. :)

xoxo, Whit


Wednesday, February 8, 2012

Valentine's Day DIY: roundup

I may just attempt to perfect one or all of these by this weekend for my lovebug Cory.

create a brass Valentine from Camille Styles

learn to make my own stamps via Design Sponge


or you can be like me and whip up your favorite breakfast via The Color Issue
(you know to get to the heart, you must first go through the stomach!)

Want a more savory option?

How about a egg in a hole heart via Martha Stewart?
xoxo,
 

Sunday, February 5, 2012

Mirror Motivation: Round 2

Do you remember my mirror motivation from awhile back?
Here's another one involving my friend, Hannah's, chalk painted bathroom and an antique frame.


When you walk in.

When you check yourself in the mirror.

Clever.
xoxo,
 

Thursday, January 26, 2012

Blogs You Need to Follow

The interesting thing about blogging (besides the possiblility of meeting new people) is the ability to share with others the blogs that you love so much.

Here are some that I cannot live without:

I found this blog yesterday after a random afternoon of Pinterest surfing, and I ran across one of her hair tutorials for Victoria Secret hair. Enough said. Besides the obvious hair styling posts, she'll vlog some awesome makeup tutorials, and I love that she mixes inexpensive finds along with counter brands. I'm also rather jealous of her longggg hair.

I actually have the pleasure of knowing Candace in real life, and ever since we have met in Phi Mu, we have shared ideas about how our wedding planning would look like one day. (Yeah, we are those girls...) Since becoming engaged, Candace started a blog of all her DIY projects, dress shopping finds, and wedding ideas. Let me tell y'all, this girl has style, taste, and is always put together. And of course, I get positively giddy when a new post of her shows up on my feed. The latest one has to do with her DIY save the dates. Adorrrrable.

One of the first blogs I've ever followed, "Grits" had me hooked from day one with her southern charm, recipes, and amazing photography skills. My favorite is her Lemon Icebox Pie.


Any blogs I need to follow? Or tell me about yours! I love learning about new ones :)
xoxo,
 

Saturday, December 17, 2011

DIY: Christmas Wrapping

Better late than never, right?


Jessica had asked me on my Glitter Pumpkin DIY post if I had any ideas for a Christmas time DIY. Well, girl, not only is this post for you and anyone else looking for a seasonal DIY, it can also function for any other gift giving opportunity around the year.

The idea came from this wonderful kit I purchased last year from Home Depot (cost - $20).
And you know Martha can do no wrong.


This tool alone is worth the price of the whole box.

Add some gold paint (I think it looks festive).

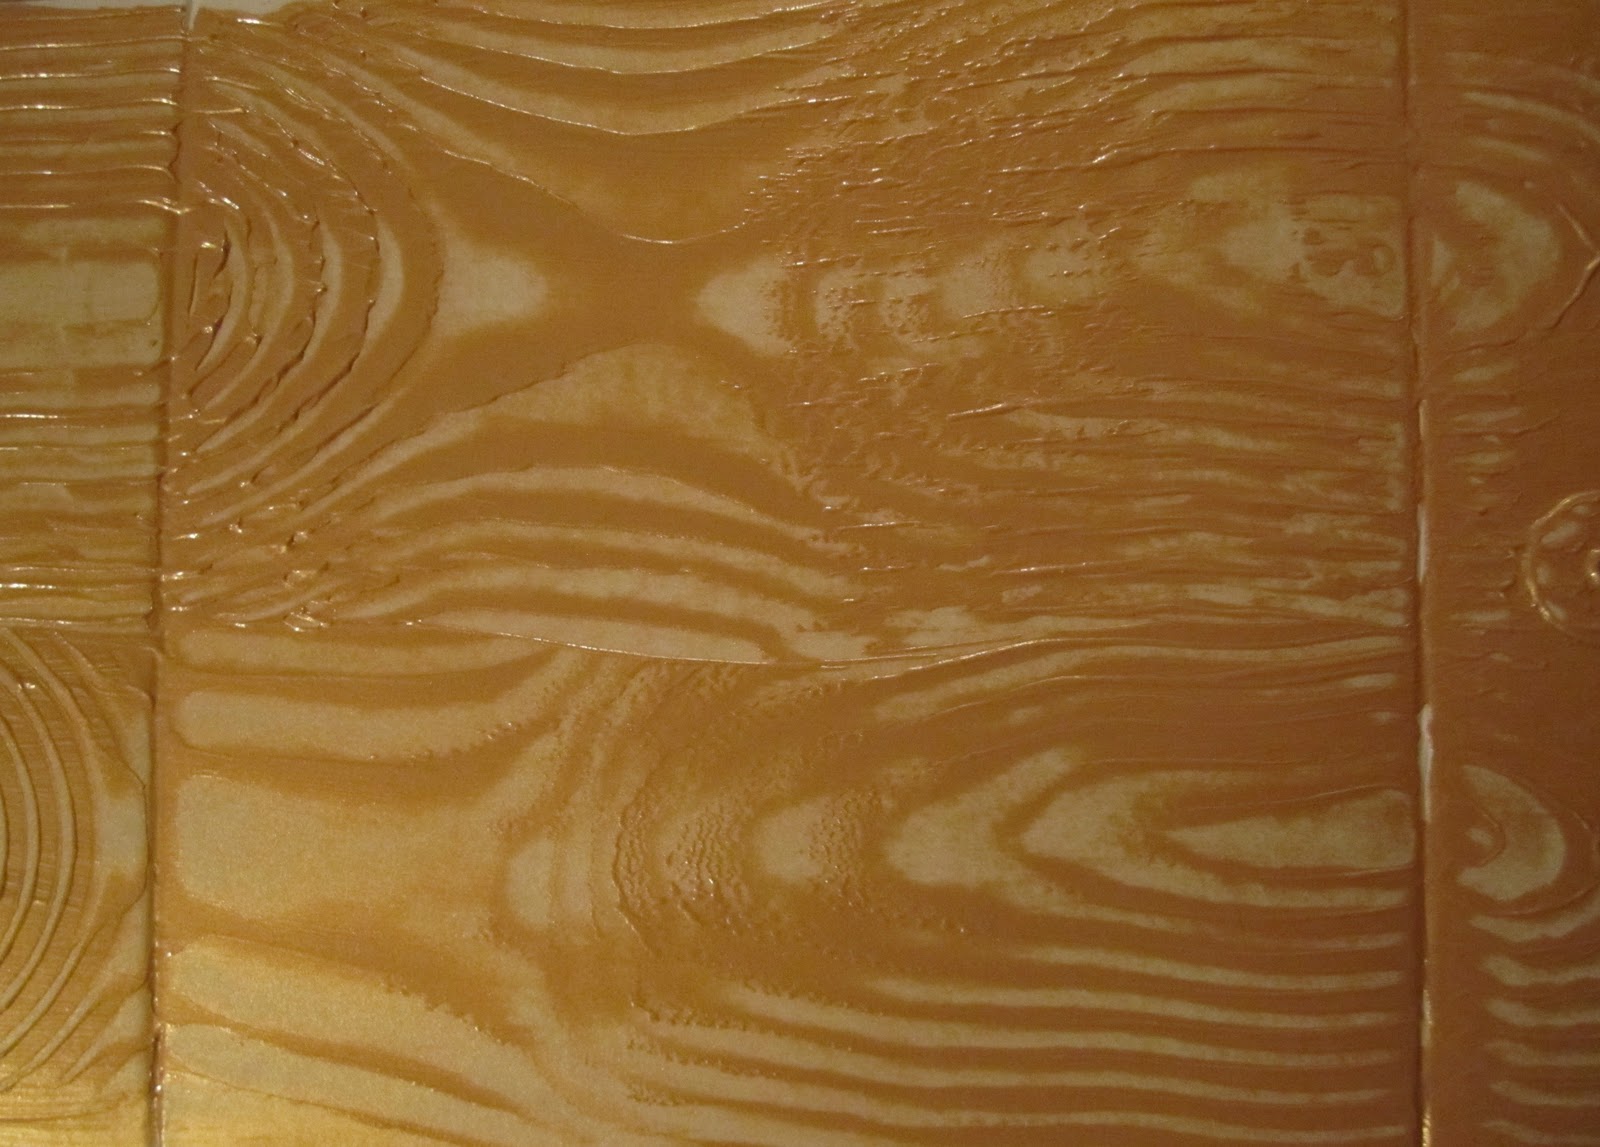
And using your hand to glide the tool in a seesaw motion, you now have a woodgrain effect.

Tie up with yarn, and maybe a couple of tassels or pom poms, and you are done!

xoxo,
 

Tuesday, November 1, 2011

DIY: Glitter the Pumpkins

Ok, I confess...I have an unnatural affection for Martha Stewart's glitter collection.
There's just so many colors!

Instead of carving pumpkins this year, I thought I would use my two favorite craft tools, spray paint and glitter, to make a little decor in the meantime.
Boom.

I'm sure you can already tell how the craftiness ensued without having a full on DIY instruction.
But just in case -
1. Spray paint pumpkin with a shiny, copper spray paint. This helps you not using so much glitter.
2. Glue everywhere. I used modge podge and a sponge paint brush.
3. BRING ON THE GLITTER!
4. Enjoy vacuuming said glitter until after Thanksgiving. Which is precisely the same date my pumpkin will finish his run as my decoration.


xoxo,
 

Tuesday, October 4, 2011

DIY: Love Canvas

As you call know, my sweet friend, Jen Marie, over at Southern Belle is getting married in less than a couple of weeks. (Can't believe it's almost here, JM!!!)
I wanted to make her something special and one of a kind, so when I found this inspiration on Pinterest I knew I found something perfect.
And it was much too easy to make. 

The Pinterest photo called for wooden letters, but these "thicker" foam stickers were much easier (and cheaper!) to work with. Along with a canvas and a pearly spray paint, you have all the supplies you need.
To make an even shape for the heart, I used a piece of printer paper which I free handed one side of the heart, then used it to trace light dashes with a pencil, and flipped it over to mirror the other side. It's ok if you have too many pencil marks. You're going to end up spray painting over it anyways.
Now comes the fun part! Using the stickers, I arranged them at random on the canvas while still keeping in mind the tracing of the heart shape I did earlier. Because Jen Marie is a sucker for history and especially European history and literature, I added in an amore just to personalize it for her. :) And last but not least I added in their wedding date for the two love birds. 
I finished it up with a good coat of spray paint. Instead of white like the picture suggested, I used a pearly silver.  
All done and ready to go! I hope Jen Marie liked it as much as I did!

xoxo,
 

Sunday, December 19, 2010

Holiday Season Extras

I love giving wrapped gifts. I'll even kinda admit wrapping the gift itself is almost half the fun of giving it in the first place. But what I like to add to my presents besides the typical pretty paper and bow is the not so typical little extra. Some can come on the box, others can be for the actual gift themselves, but regardless, the recipient will surely love that little extra "hmmm, I wish I though of that idea."

I thought I would show you my process of how I gift wrapped a present for my dear coworker, Kristen. She reads my blog, but is not a blogger herself, so I'm sure she will appreciate this little shout out. :) 

Painted Boxes:
Now this is the first year I've done this, but I'm definitely letting this idea stay for gift giving year around. 
Here's the steps I took:
1. Find boxes.
I've wrapped all my gifts this year in plain winter white boxes. (Gift bags eat my dust.) I would recommend white boxes for this project just to have a clearer effect, but I'm sure with any colored box will do if you use the correct corresponding paint.
2. Before you assemble the boxes you will need to set them out on a clean surface for painting.
3. Add the wow factor.
Y'all, only Martha could come up with this ingenuous tool I have dubbed the "wood grainer." It looks like a mix between a sponge roller and a massage tool but the effect it leaves is AMAZEBALLS. 
4. After applying a good layer acrylic gold paint, I roll up and down with this tool creating the wood grain. Make sure you have enough paint on the box to begin with. It shouldn't be a thin coat, but it also shouldn't be oozing over the sides. Find a happy medium. 
5. Air dry for a good hour or two.  
6. Assemble box and wrap gift. No messy wrapping paper to deal with. No tape. No messy edges. 
Like I said. AMAZEBALLS.


Stamped Tags
I love this because it's cheap, simple and little children can do it. 
Steps I take:
1. Find plain manila tags.
2. Add the wow factor. 
3. Using stamps, flocking powder (which makes the stamp images fuzzy), glitter, etc. make a one of a kind tag that people will never want to rip off and throw away. 
I found this owl stamp at Michael s for a dollar, and using the saying I found from my Target wrapping paper, I made a pretty nifty gift tag. 

Yarn Ribbons
I've purchased all kinds of real fancy ribbon in the past just to see it make one bow on one gift. Since I'm not a millionaire, I've realized that beautiful luxury must be put out to pasture until momma gets paid more money. 
Steps I take:
1. Find different colored yarn. This can be simple really since great places like Hobby Lobby sells it for relatively cheap. I think the stuff i bought was $3.To go with the gold, I picked purple yarn. (I'm sure all the LSU fans will love that!)
2. Add the wow factor. 
5. You can either braid the yarn, wrap the yarn around the package in the cross motion a few times, etc.
6. For a crafty bow, I make yarn pom poms by stretching out my thumb and pointer finger and wrapping it several times within the space. 
7. Take another piece of yarn and tie it in the middle cutting in into two sections.
8. Take scissors and cut the ends of each section where it forms a loop and start spacing the pieces around to make your bow. 
And here's all three things as a finished product.

How are you wrapping your presents this year? Any cool tips and tricks?


xoxo,